Creating a Collection
Collections are where you organize documents and connect data sources. Think of a collection as a folder inside a library. You upload documents, connect external sources, and use collections in your applications and agents.
Collections group documents and knowledge. You can use them in your applications so agents can answer questions using your actual data.
How Collections Fit Into Your Workflow
Collections are created within libraries and serve as data sources for your applications. Agents use collections to answer questions, and templates use collections to generate documents based on your knowledge.
You need to have:
- A Docana account with appropriate permissions
- An existing library (see Creating a Library if you need to create one first)
Video Tutorial
Step 1: Open Your Library
- Go to platform.docana.com and sign in
- Click Libraries in the sidebar
- Click the library where you want to add a collection
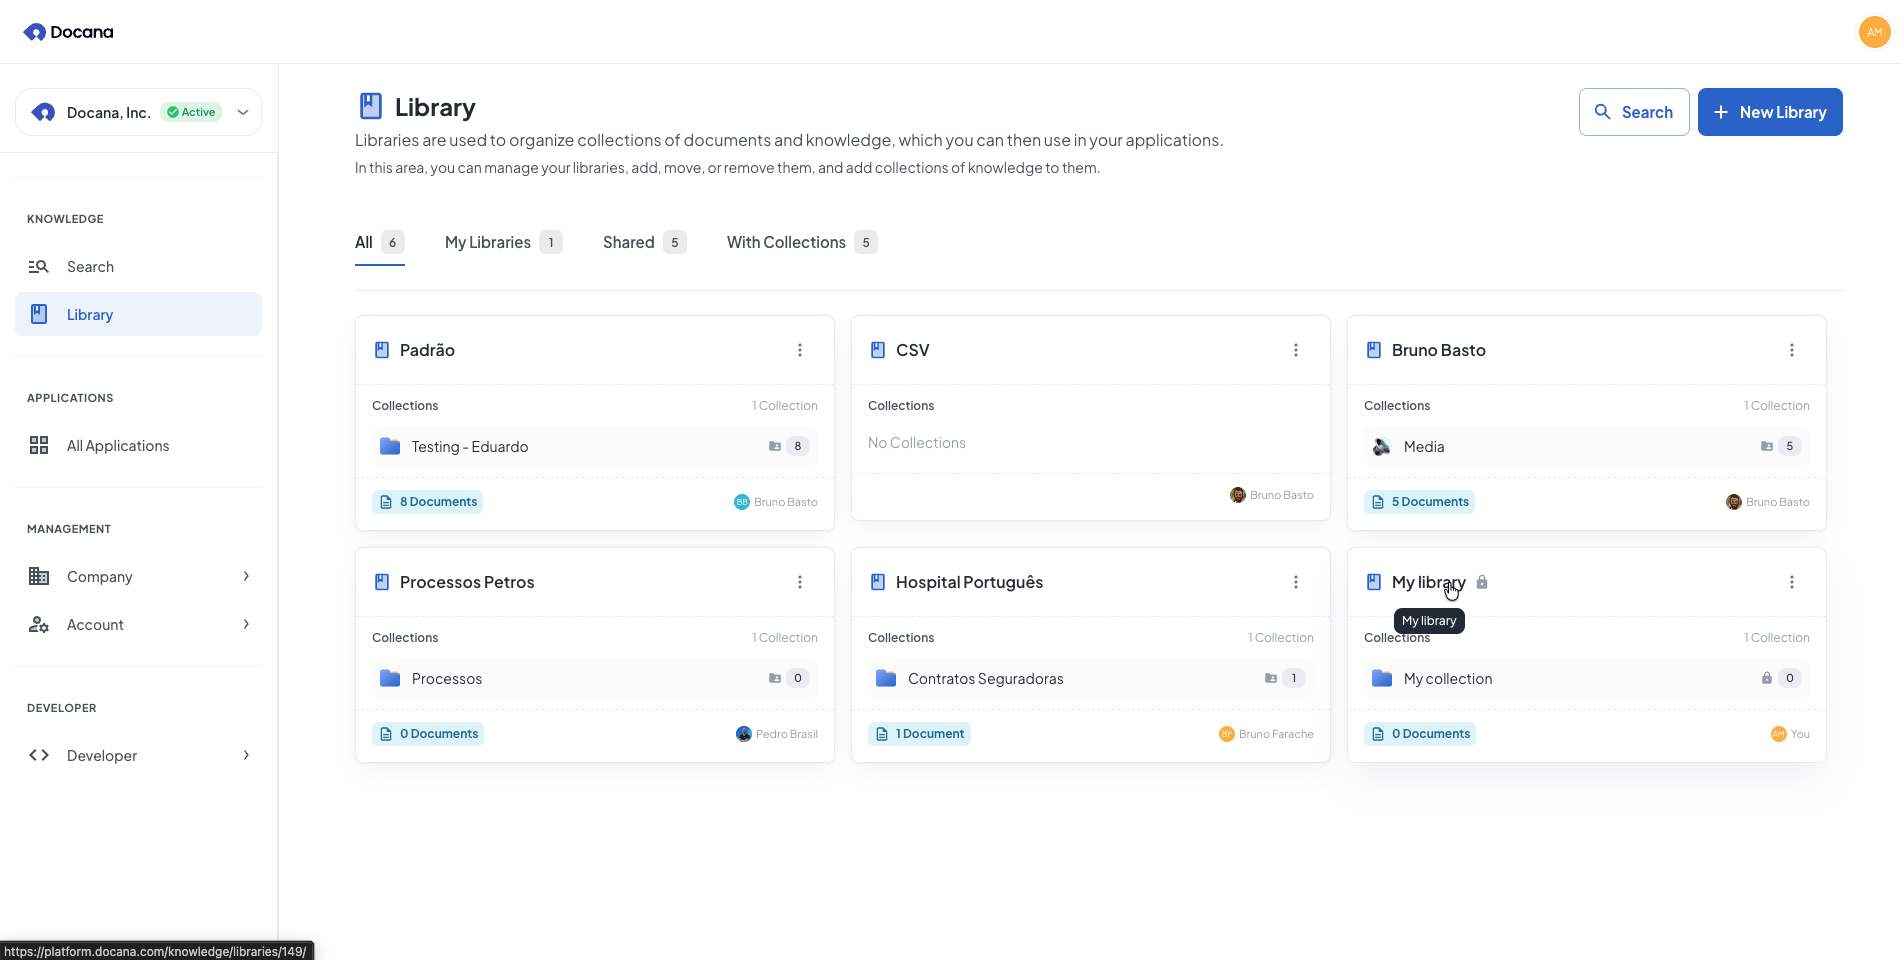
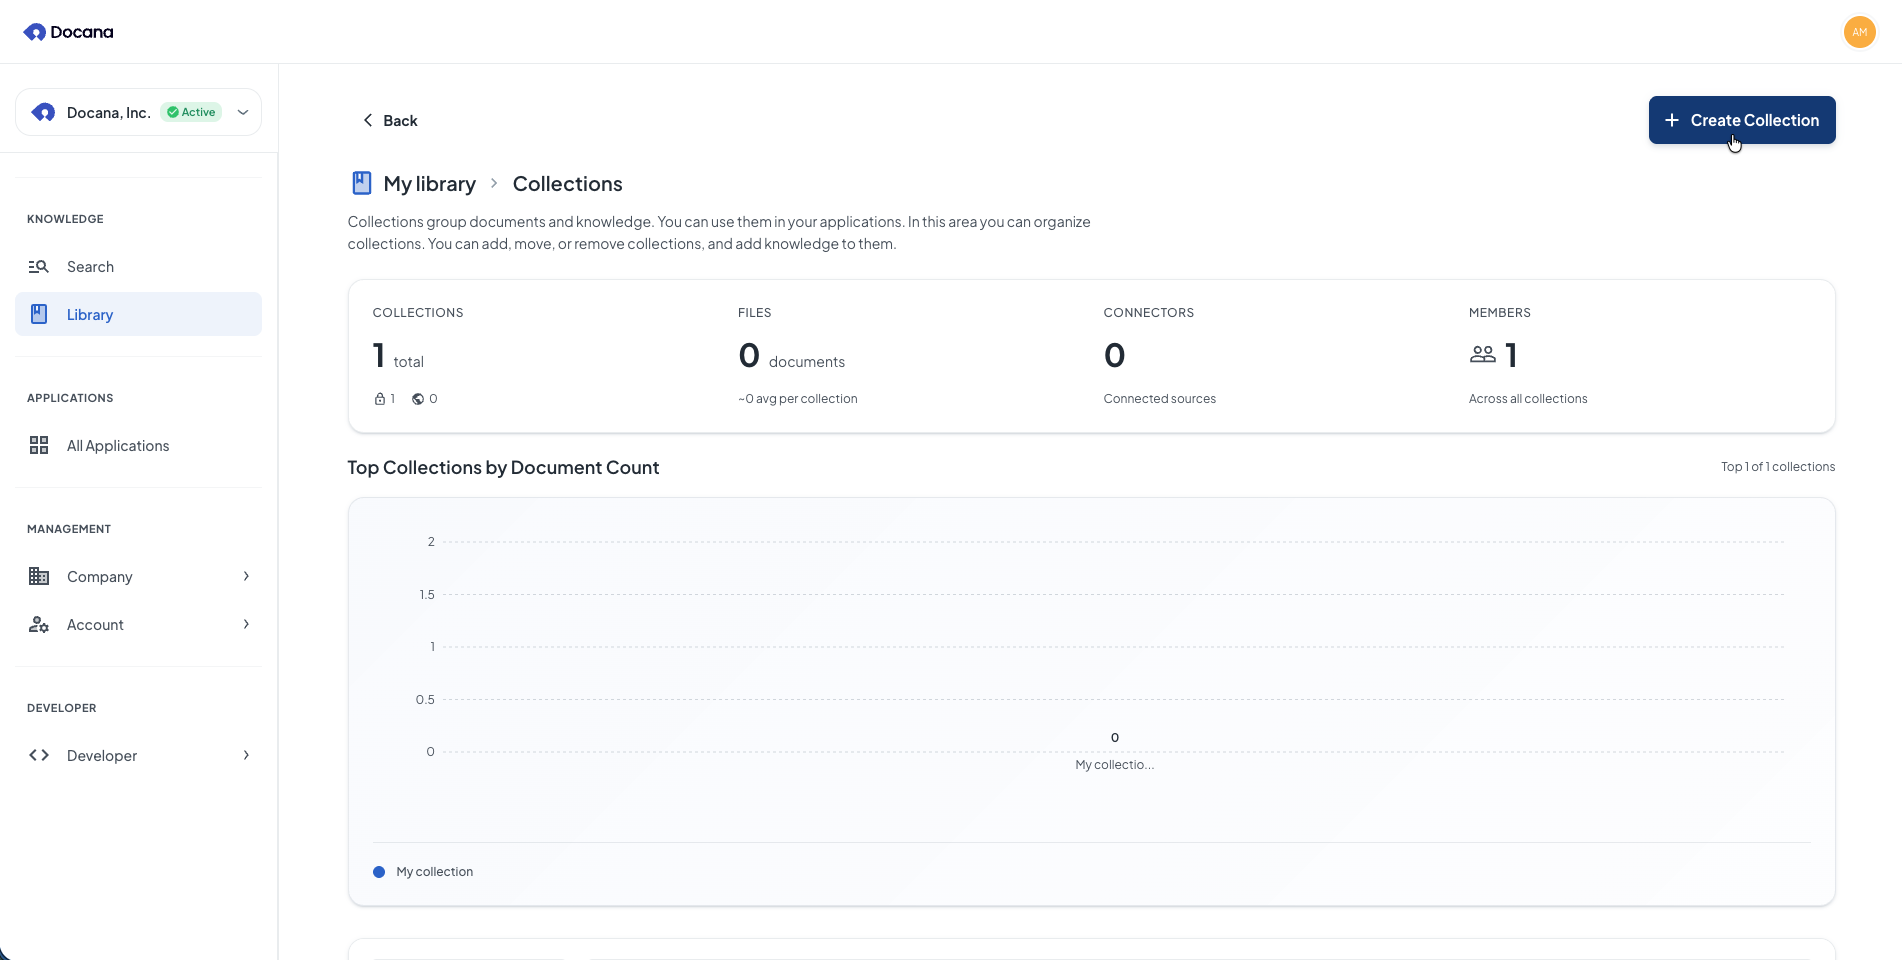
Step 2: Create a New Collection
Once you're inside your library, click New Collection (top right corner).
Step 3: Enter Details
Enter these details:
-
Collection Name: Pick a name that describes what documents go in this collection (e.g., "Contract Templates", "Employee Handbook", "Product Specs", "Training Videos").
-
Icon: Choose an icon to make the collection easy to spot. Click the icon picker to browse options.
-
Description (optional): Explain what this collection is for. This helps your team understand it.
-
Private: Choose whether the collection is private or public:
- Private (default): Only you and people you invite can see this collection
- Public: Everyone in your company can see this collection
If your library is private, you can't make collections public. To make a collection public, you first need to make the library public.
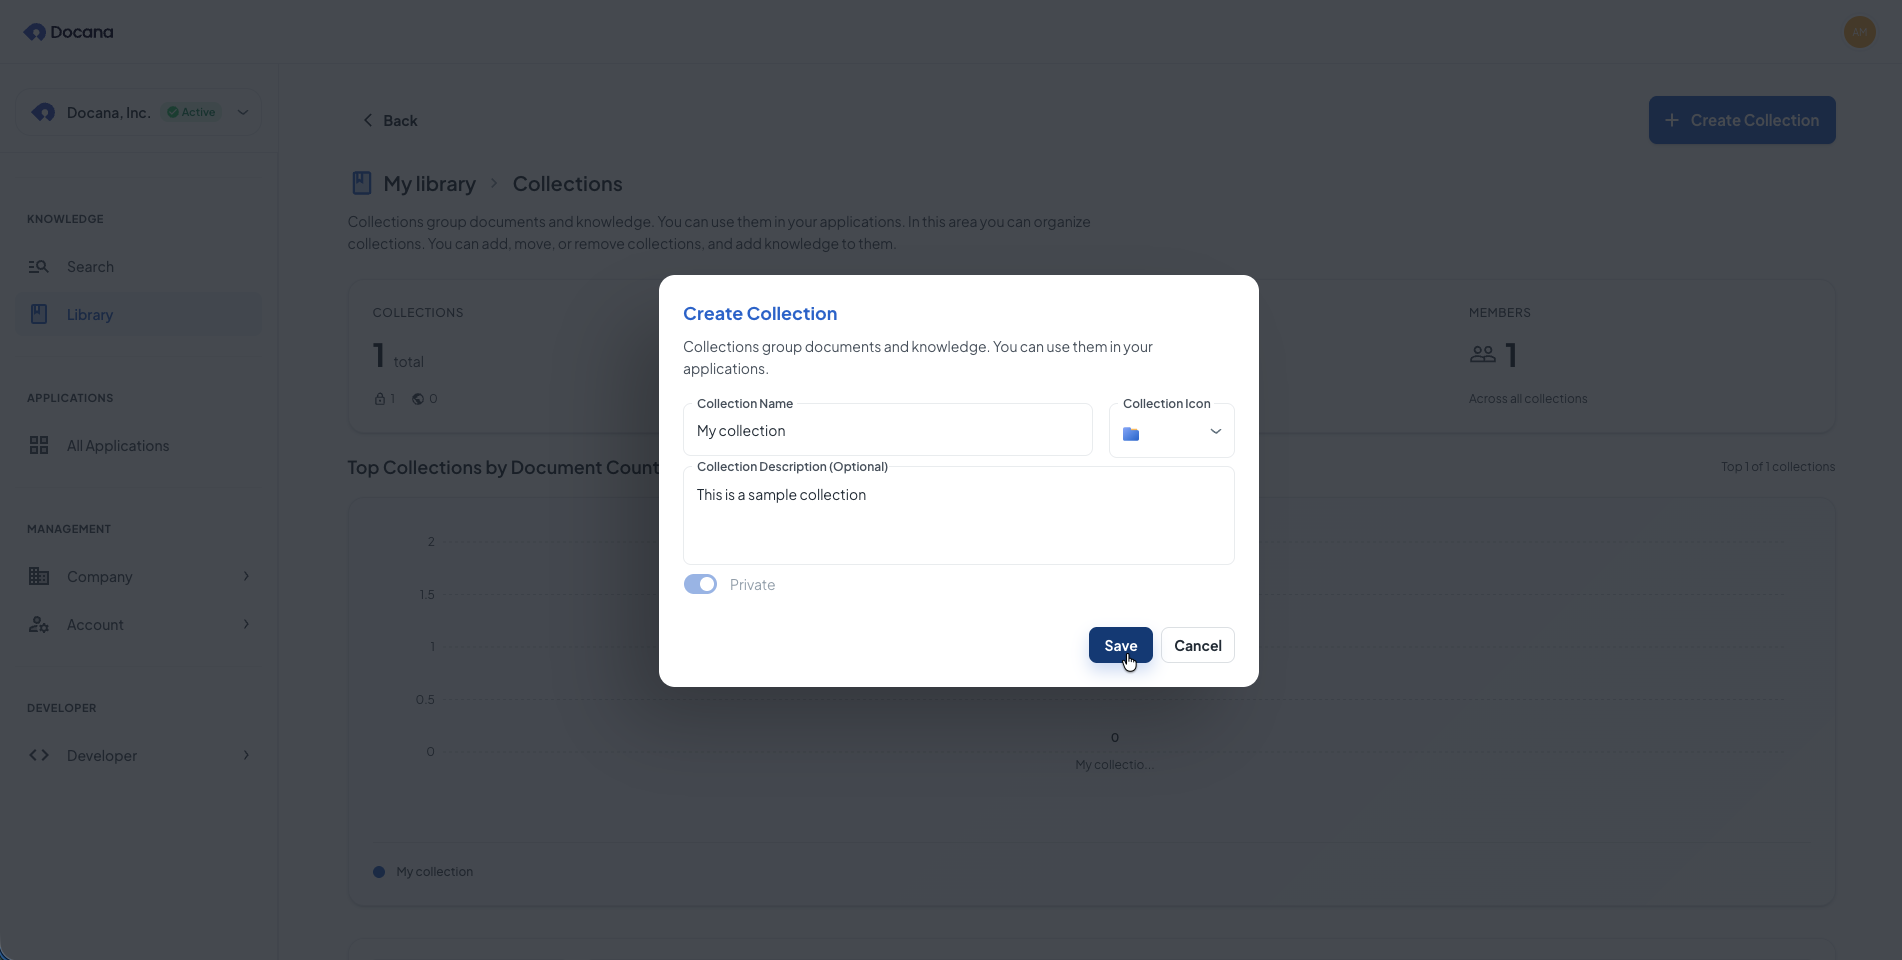
Click Save to finish.
Step 4: What's Next
After creating your collection, you'll see it in your library:
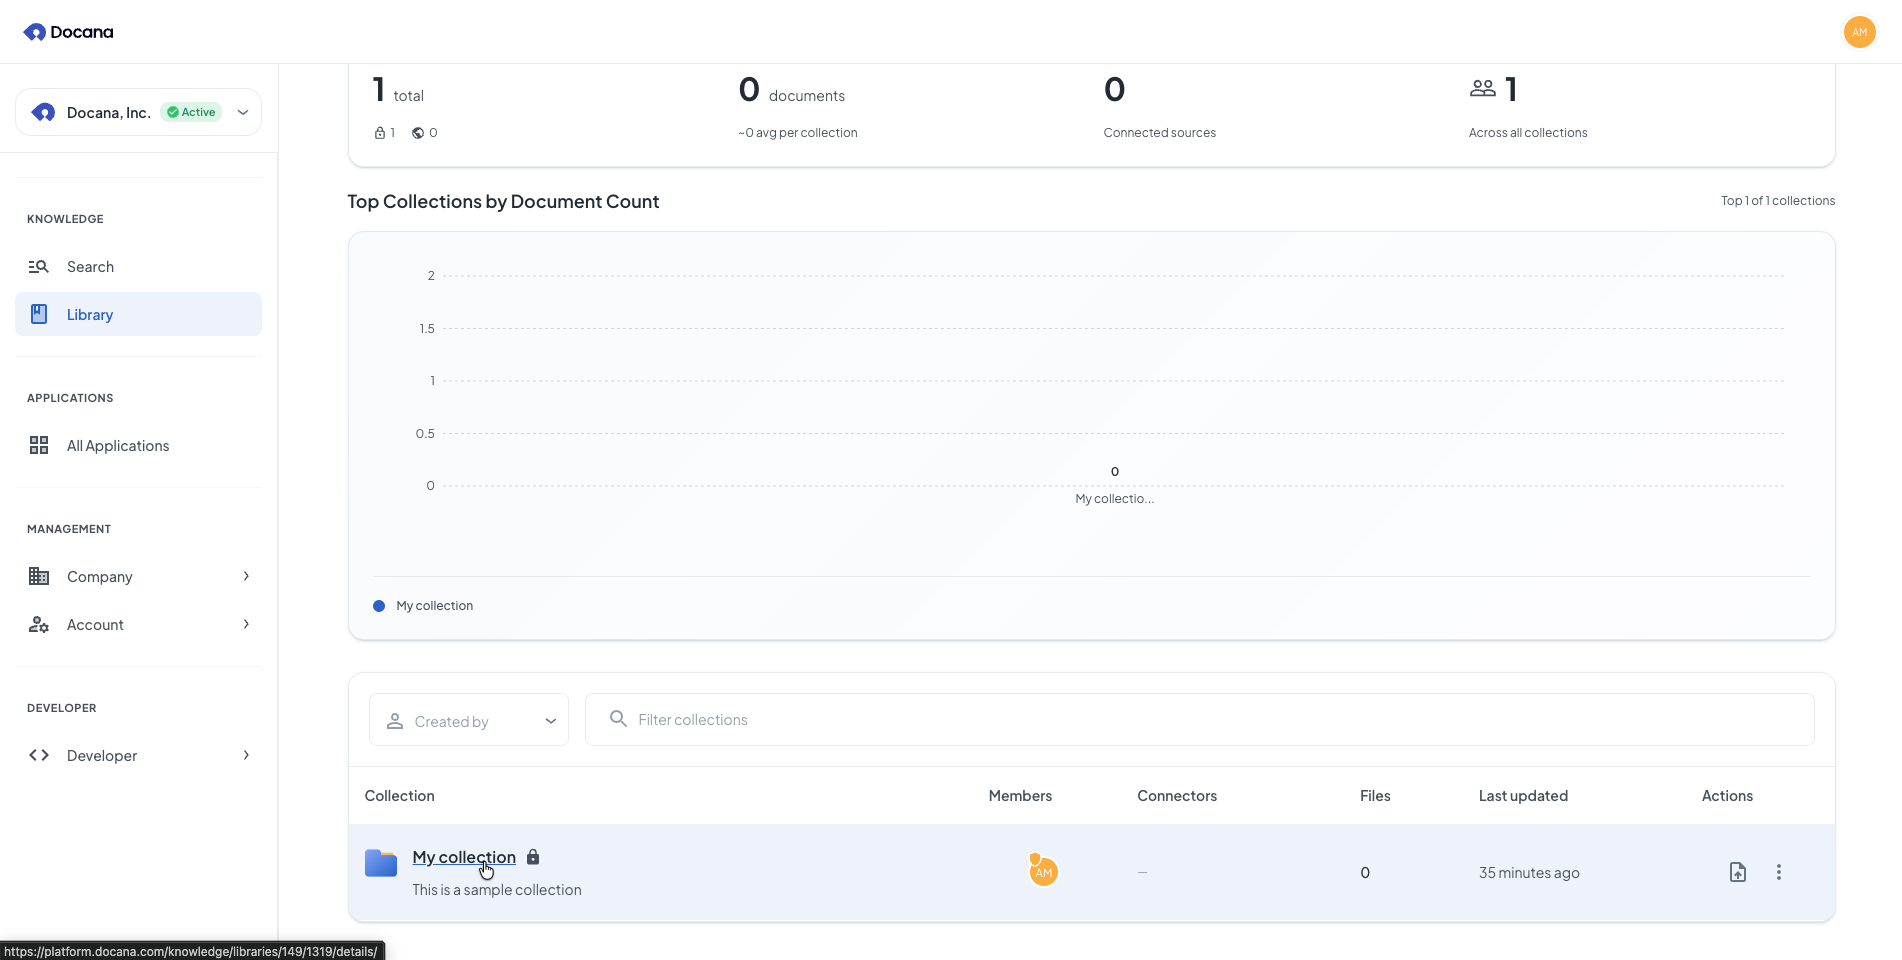
In your collection:
- Upload documents (PDFs, Word files, images, videos, audio)
- Connect external data sources (connectors)
- Add members and set permissions
- View and manage documents
Use your collection:
- Add it to agents so they can answer questions using your documents
- Use it in applications for document generation and templates
- Search documents at Enterprise Search
Managing Collections
From the library page, you can:
- Open: Click a collection name to see its documents and settings
- Edit: Click the edit icon to change the collection name, icon, description, or privacy settings
- Delete: Click the delete icon to remove permanently
Deleting a collection removes all documents inside it. You can't undo this.
Best Practices
-
Use clear names: Pick names that show what documents go in the collection (e.g., "Contract Templates", "Employee Handbook", "Product Specs").
-
Organize by purpose: Create collections for specific use cases. This makes it easier to find documents and helps agents work better.
-
Add descriptions: Use the description field to explain what the collection is for. This helps your team and helps agents understand context.
-
Set privacy carefully: Use private collections for sensitive documents. Use public collections for documents everyone needs.
-
Add documents: Upload documents or connect external sources so your collection has content to work with.
-
Use in applications: Add collections to your agents and applications so they can use your documents to answer questions.
Next Steps
- Creating an Agent - Use collections in agents to answer questions
- Enterprise Search - Search across all your documents
- Creating a Library - Create more libraries to organize your knowledge