Creating an Agent
Agents are AI assistants that know your business. They read your documents, watch your videos, and listen to your audio, then answer questions and automate work.
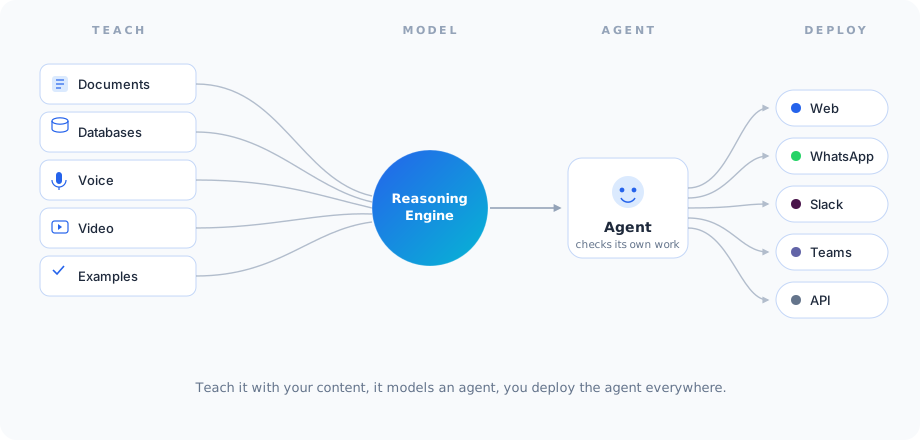
Unlike old chatbots that only read text, Docana agents understand everything. They check their own answers before responding, so you get consistent results every time.
Your agents use your company's documents to answer questions. They can cite sources, understand your terminology, and make decisions based on your actual data. Search your documents at Enterprise Search.
You need to have:
- A Docana account with appropriate permissions
- An existing application (see Creating an Application if you need to create one first)
Video Tutorial
What Makes Docana Agents Different
Agents That Understand Everything
Old chatbots only read text. Docana agents understand:
- Text (PDFs, contracts, policies)
- Images (charts, diagrams, photos)
- Videos (training materials, recorded meetings)
- Audio (voice recordings, calls)
So you can ask: "What does the chart on page 5 show?" or "Find where the training video explains safety procedures."
Agents Check Their Own Answers
Agents check their own answers before responding. This means:
- Consistent results every time
- Fewer mistakes
- You know how confident the agent is about each answer
Agents Know Your Business
Agents use your company's documents to answer questions. They can:
- Cite specific documents
- Understand your company's terminology
- Use historical information
- Make decisions based on your actual data
Step 1: Create a New Agent
- Click Applications in the sidebar
- Pick the application where you want to add an agent
- Click Agents in the sidebar
- Click + Create Agent (top right corner)
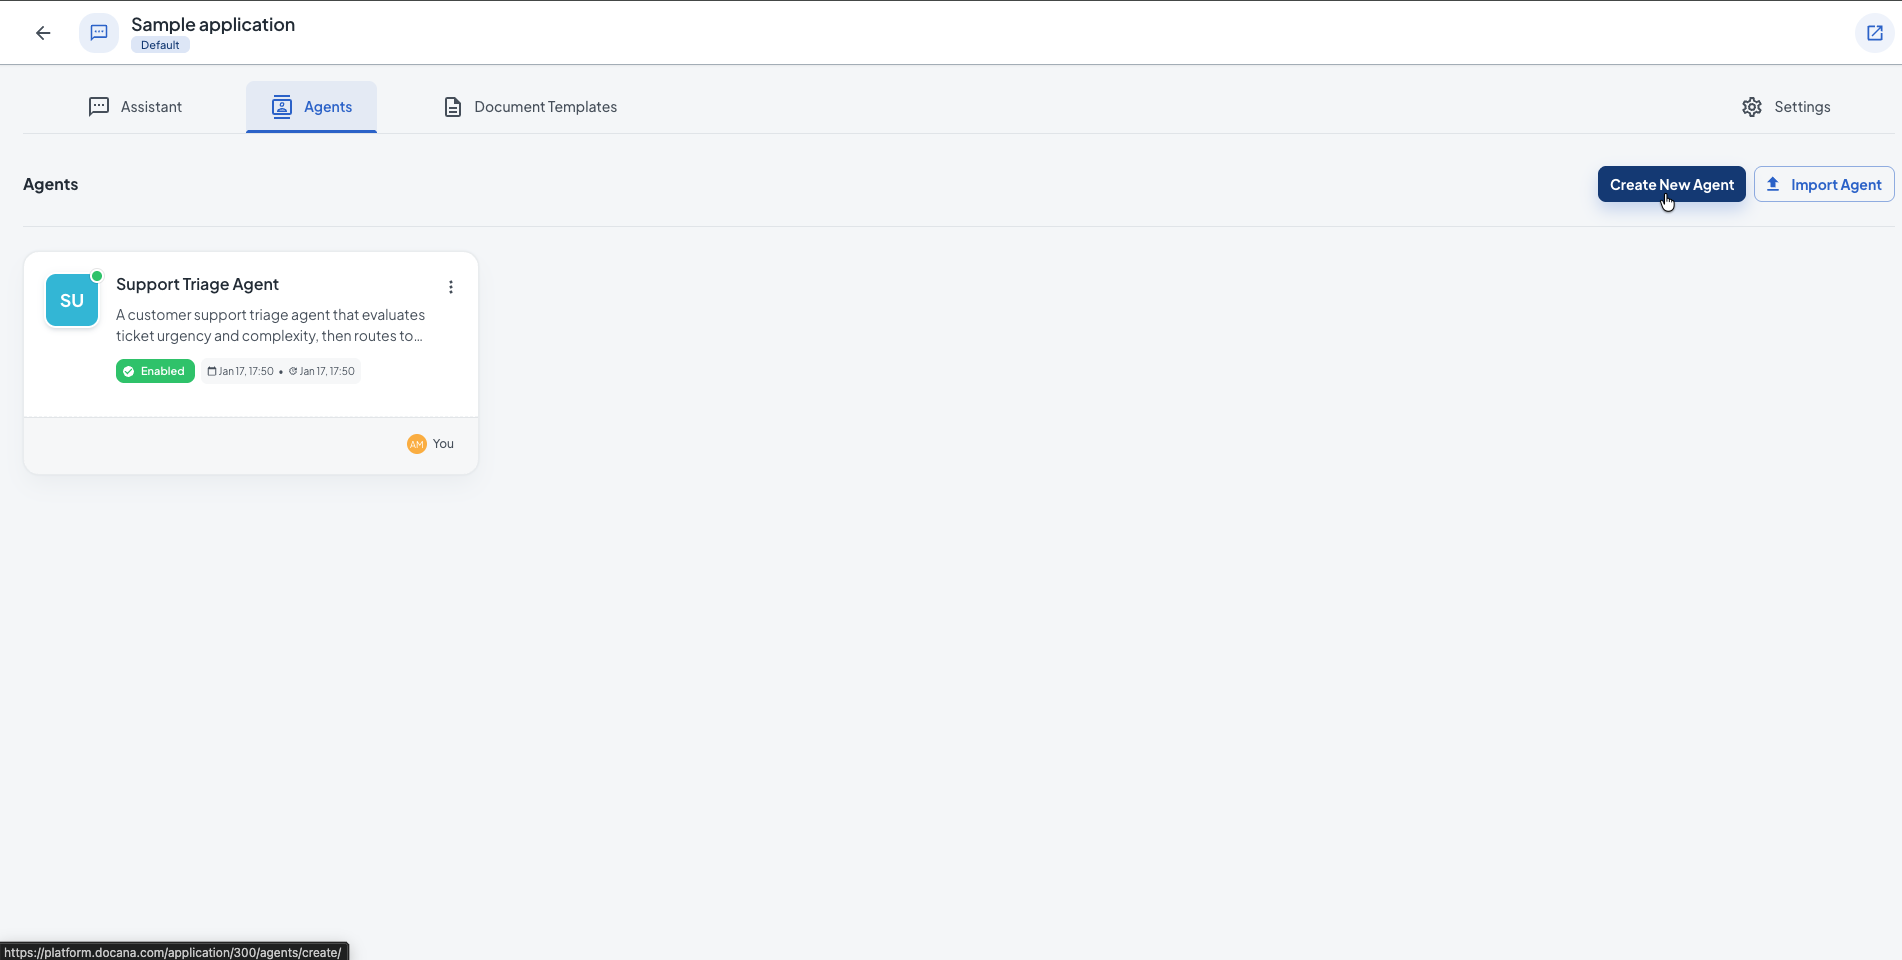
Step 2: Set Up Your Agent
Enter these details:
Basic Information
-
Name: Pick a name that describes what the agent does (e.g., "Customer Support Bot", "Contract Analyzer", "Sales Assistant", "HR Policy Expert").
-
Description (optional): Explain what the agent does. This helps your team and helps the agent understand its role.
-
System Prompt: Define the agent's role and how it should behave. Include:
- What the agent does
- How it should talk (formal, friendly, technical)
- What it should and shouldn't do
- How to handle questions it can't answer
Example:
You are a customer support assistant helping users with their inquiries. Your role is to evaluate support tickets for urgency and complexity, then route them appropriately.For urgent issues (account lockouts, payment problems, security concerns) or complex technical problems, escalate to a human agent.For common questions (pricing, features, account settings), provide helpful automated responses.When information is missing, ask clarifying questions to gather necessary details.
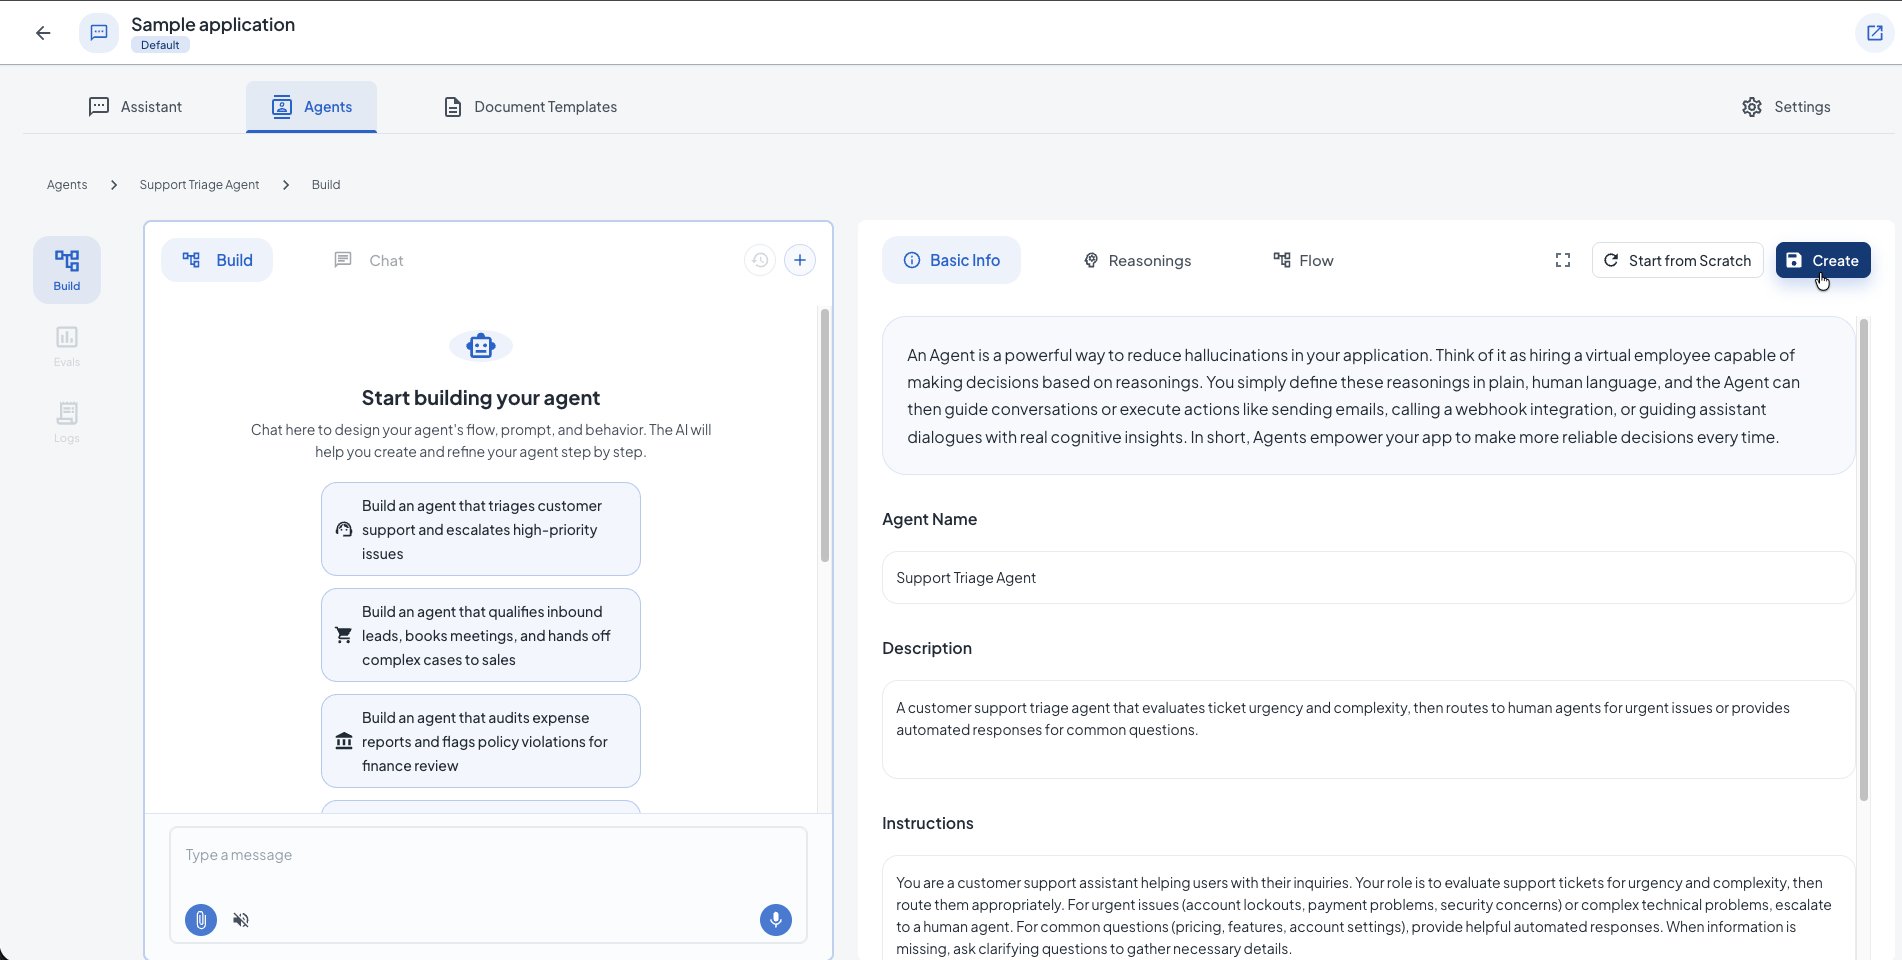
Additional Settings (Optional)
-
Environment: Select an environment to use environment variables in your agent's workflow. Environments help you manage different configurations for development, staging, and production.
-
Coordinator: When enabled, this agent will wait for other agents to complete their evaluations first, then receive their results as context to make coordinated decisions. Useful for synthesizing insights from multiple agents in document insights workflows.
-
Respond with Audio: When enabled, the agent will respond with audio when the user sends audio messages. This is particularly useful for WhatsApp voice interactions.
Knowledge Base
After creating your agent, you can configure which documents the agent can use by building its workflow. Collections and libraries are configured in the agent's workflow nodes, not in the basic information form. Manage your knowledge base at Knowledge Libraries.
Using the Agent Builder
The Agent Builder provides a conversational interface to design your agent's flow, prompts, and behavior. Think of it as Lovable, but for agents. Instead of manually configuring every detail, you can chat with the AI to help create and refine your agent step by step.
How It Works
- Start a Conversation: After creating your agent, navigate to the Build tab
- Describe Your Agent: Tell the AI what you want your agent to do. You can use the suggested templates or describe your own use case
- Refine Step by Step: The AI will help you design the workflow, prompts, and decision logic
- Review and Adjust: Check the generated configuration in the right panel and make adjustments as needed
The Agent Builder is particularly useful for:
- Complex workflows with multiple decision points
- Agents that need to integrate with external services (email, webhooks, etc.)
- Custom logic that requires conditional branching
- Rapid prototyping and iteration
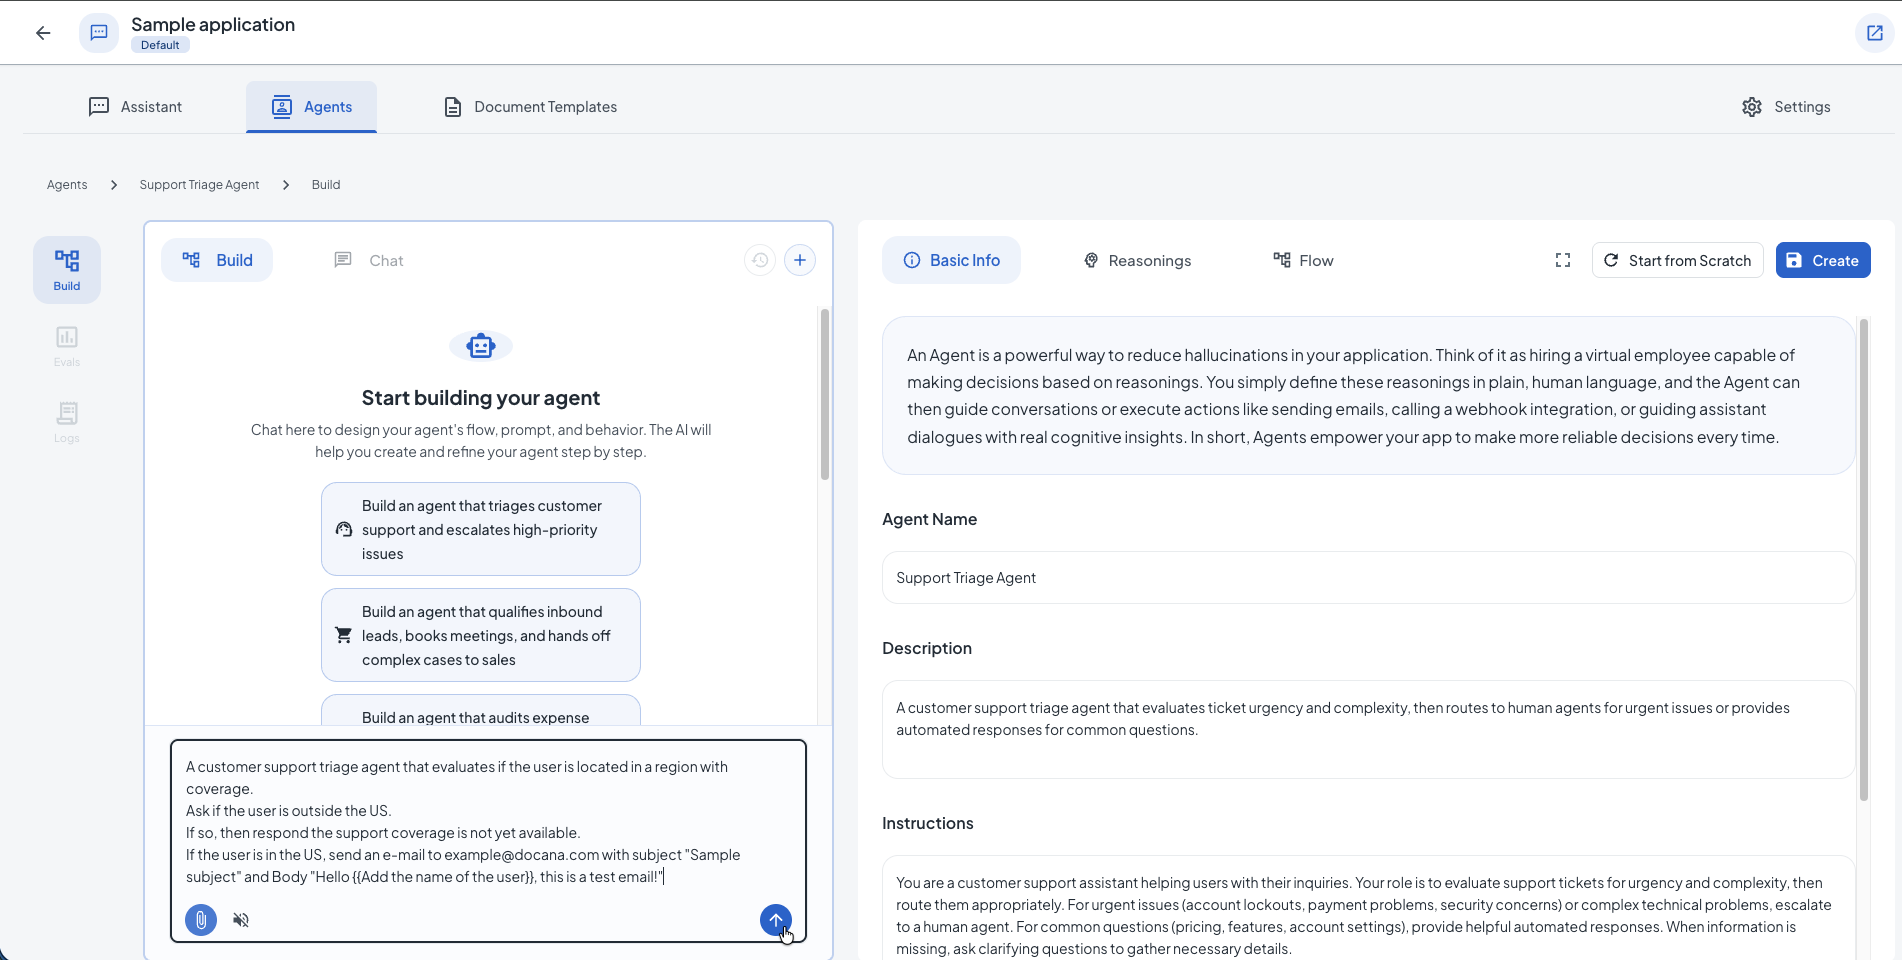
You can also start from scratch by clicking Start from Scratch to manually configure your agent without using the conversational builder.
Creating a Reasoning
A reasoning (also called an evaluation criterion) is a way to measure how well your agent performs specific tasks. Think of it as a quality check that evaluates whether your agent's responses meet certain standards or requirements.
What is a Reasoning?
Reasonings are evaluation criteria that define what "good" looks like for your agent's responses. They help you:
- Measure performance: Understand how well your agent handles different types of questions
- Set quality standards: Define what information should be included, what format to use, or what logic to follow
- Improve over time: Use reasoning results to refine your agent's workflow and instructions
Each reasoning consists of:
- Evaluation criteria: A description of what should be evaluated (e.g., "Response includes order number", "Answer is specific and detailed")
- Evaluation steps: Step-by-step instructions for how to evaluate the response
- Structured data parameters: Optional fields to extract specific information from the response
Reasonings are used in decision nodes within your agent's workflow to route conversations and ensure quality. They can also be used to test your agent and measure its performance over time.
Video Tutorial
Modeling Agent Flow
Your agent's workflow defines how it processes user questions and generates responses. The flow consists of different types of nodes connected together:
- Instruction nodes: Provide guidance on how to respond
- Reasoning nodes: Extract structured insights before generating responses (used in complex flows)
- Decision nodes: Use evaluation criteria to route the conversation based on the context
- Webhook nodes: Integrate with external services
- JavaScript nodes: Transform data with code — exact math, parsing, and formatting without an LLM call
Here's how those nodes fit together in a customer-support agent that evaluates each message, then routes it:
A single step can do more than reply. Action nodes also send email, call your APIs, generate documents, schedule follow-ups, or hand off to another agent:
By modeling your agent's flow, you make it predictable and deterministic. The same input always follows the same path through your workflow, which keeps behavior reliable and makes it easier to debug and improve.
Modeling your agent's flow involves:
- Understanding the different paths your agent might take
- Defining decision points where the flow branches based on conditions
- Configuring reasoning steps to extract relevant information
- Setting up instructions that guide the agent's responses
Video Tutorial
Testing an Agent
Testing your agent ensures it performs well before deploying it to users. You can test your agent by:
- Manual testing: Use the chat interface to try different questions and scenarios
- Automated testing: Create test cases with expected outputs and evaluation criteria
- Performance monitoring: Review reasoning results to identify areas for improvement
When testing, consider:
- Edge cases: Unusual or unexpected inputs
- Different question types: Simple queries, complex multi-step requests, ambiguous questions
- Response quality: Accuracy, completeness, relevance, and format
- Source citations: Whether the agent correctly references its knowledge base
Video Tutorial
Step 3: Save and Test
- Click Create to save your agent
- Use the chat interface to test it
- Try different questions, including edge cases
- Check that sources are cited correctly
- Make adjustments if needed
Using Your Agent
Once created, your agent is automatically enabled and ready to use in your application. You can access it through:
Web
Put your agent on your website or in your app. Use the embed code or API. Set up at Developer Integrations.
WhatsApp
Let customers talk to your agent on WhatsApp. Good for:
- Customer support
- Order questions
- Product info
- Scheduling
WhatsApp is configured at the application level, not the agent level. To set up WhatsApp:
- Go to your application settings
- Navigate to the Plugins section
- Enable WhatsApp and configure your phone number
- Optionally, select a specific agent for routing (or use automatic routing)
You can also create custom integrations for other channels using the Developer Integrations API.
Disabling an Agent
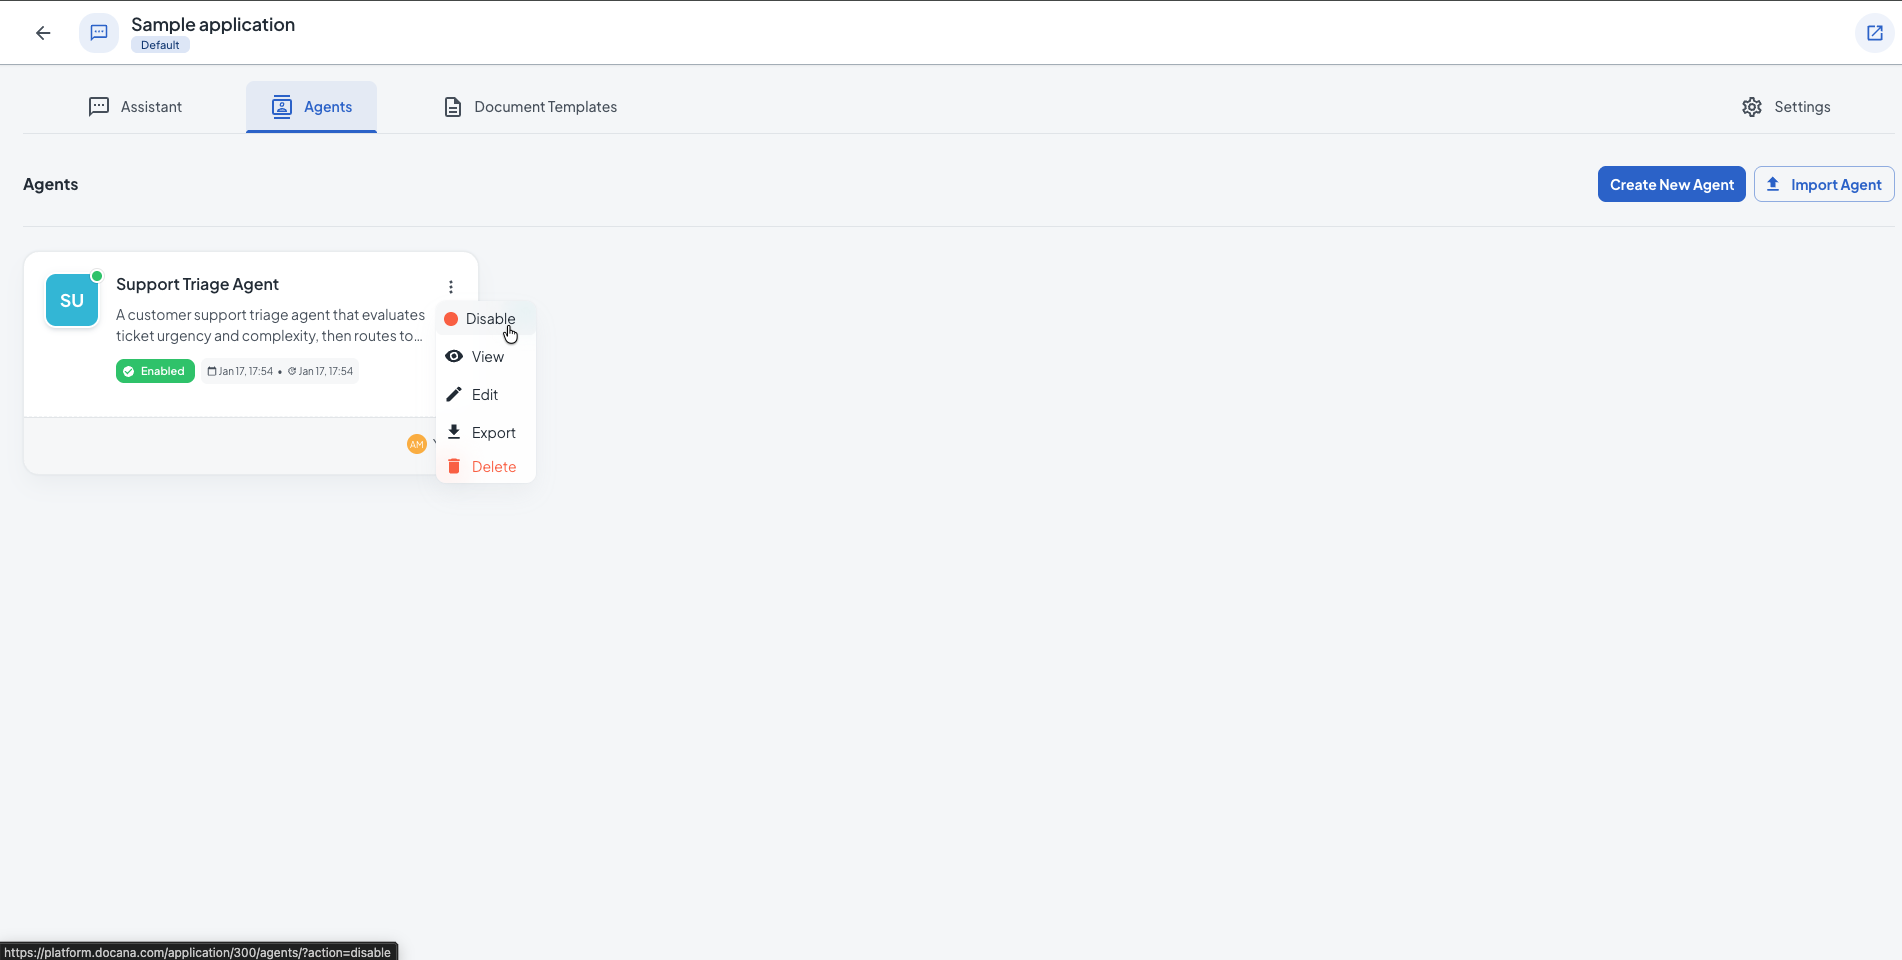
If you need to temporarily disable an agent (for example, during maintenance or testing), you can disable it from the Agents list:
- Go to the Agents section in your application
- Find the agent you want to disable
- Click the three-dot menu (⋮) on the agent card
- Select Disable from the menu
- Confirm the action in the dialog that appears
When disabled, the agent will not respond to user queries, but all its settings and conversation history are preserved. You can re-enable it at any time by selecting Enable from the same menu.
Managing Agents
From the Agents list, you can:
- Edit: Click an agent name to modify settings
- Enable/Disable: Click the three-dot menu (⋮) on an agent card and select Enable or Disable
- View: Click the three-dot menu and select View to see agent details
- Export: Click the three-dot menu and select Export to download the agent configuration
- Delete: Click the three-dot menu and select Delete to remove permanently (this deletes all conversation history)
Test changes in a staging environment first, especially for customer-facing agents.
Best Practices
-
Write clear system prompts: Define the agent's role, tone, and limits. Include examples of good responses and what the agent should not do.
-
Give access to relevant documents only: Only include collections the agent needs. This makes it more accurate and faster.
-
Configure model tiers in workflow nodes: When building your agent's workflow, you can configure model tiers (lite, regular, pro) for specific instruction nodes. Use better models for important decisions, cheaper models for simple questions.
-
Test before deploying: Try edge cases and tricky questions before letting users access the agent.
-
Add human handoff: For customer-facing agents, let them escalate to humans when they can't help.
Use Case Examples
Customer Service Agent
- Purpose: Handle common customer inquiries 24/7
- Knowledge: Product documentation, FAQs, return policies
- Deployment: WhatsApp, website chat
- Key features: Order tracking, product recommendations, support ticket creation
Contract Review Assistant
- Purpose: Help legal teams review contracts faster
- Knowledge: Standard contract templates, legal guidelines, past contracts
- Deployment: Internal web application
- Key features: Risk identification, clause comparison, compliance checking
HR Policy Expert
- Purpose: Answer employee questions about policies and benefits
- Knowledge: Employee handbook, benefits documents, compliance materials
- Deployment: Internal portal, web application
- Key features: Policy lookup, vacation balance queries, onboarding guidance
Sales Assistant
- Purpose: Help sales teams with product information and competitive intelligence
- Knowledge: Product specs, pricing, competitive analysis, case studies
- Deployment: Web application, CRM integration (via custom integrations)
- Key features: Proposal assistance, competitive comparisons, pricing guidance
Next Steps
- Creating a Library - Organize your documents in knowledge libraries
- Creating a Collection - Add collections to organize documents within libraries
- Creating a Template - Set up templates for document generation
- Creating an Application - Organize your agents into applications