Creating an Application
Applications help you organize your AI assistants, documents, and workflows. Here's how to create one.
You need to have a Docana account with appropriate permissions to create applications. Contact your organization administrator if you don't have access to the Applications section.
Video Tutorial
Step 1: Create a New Application
- Go to platform.docana.com and sign in
- Click Applications in the sidebar
- Click + Create Application (top right corner)
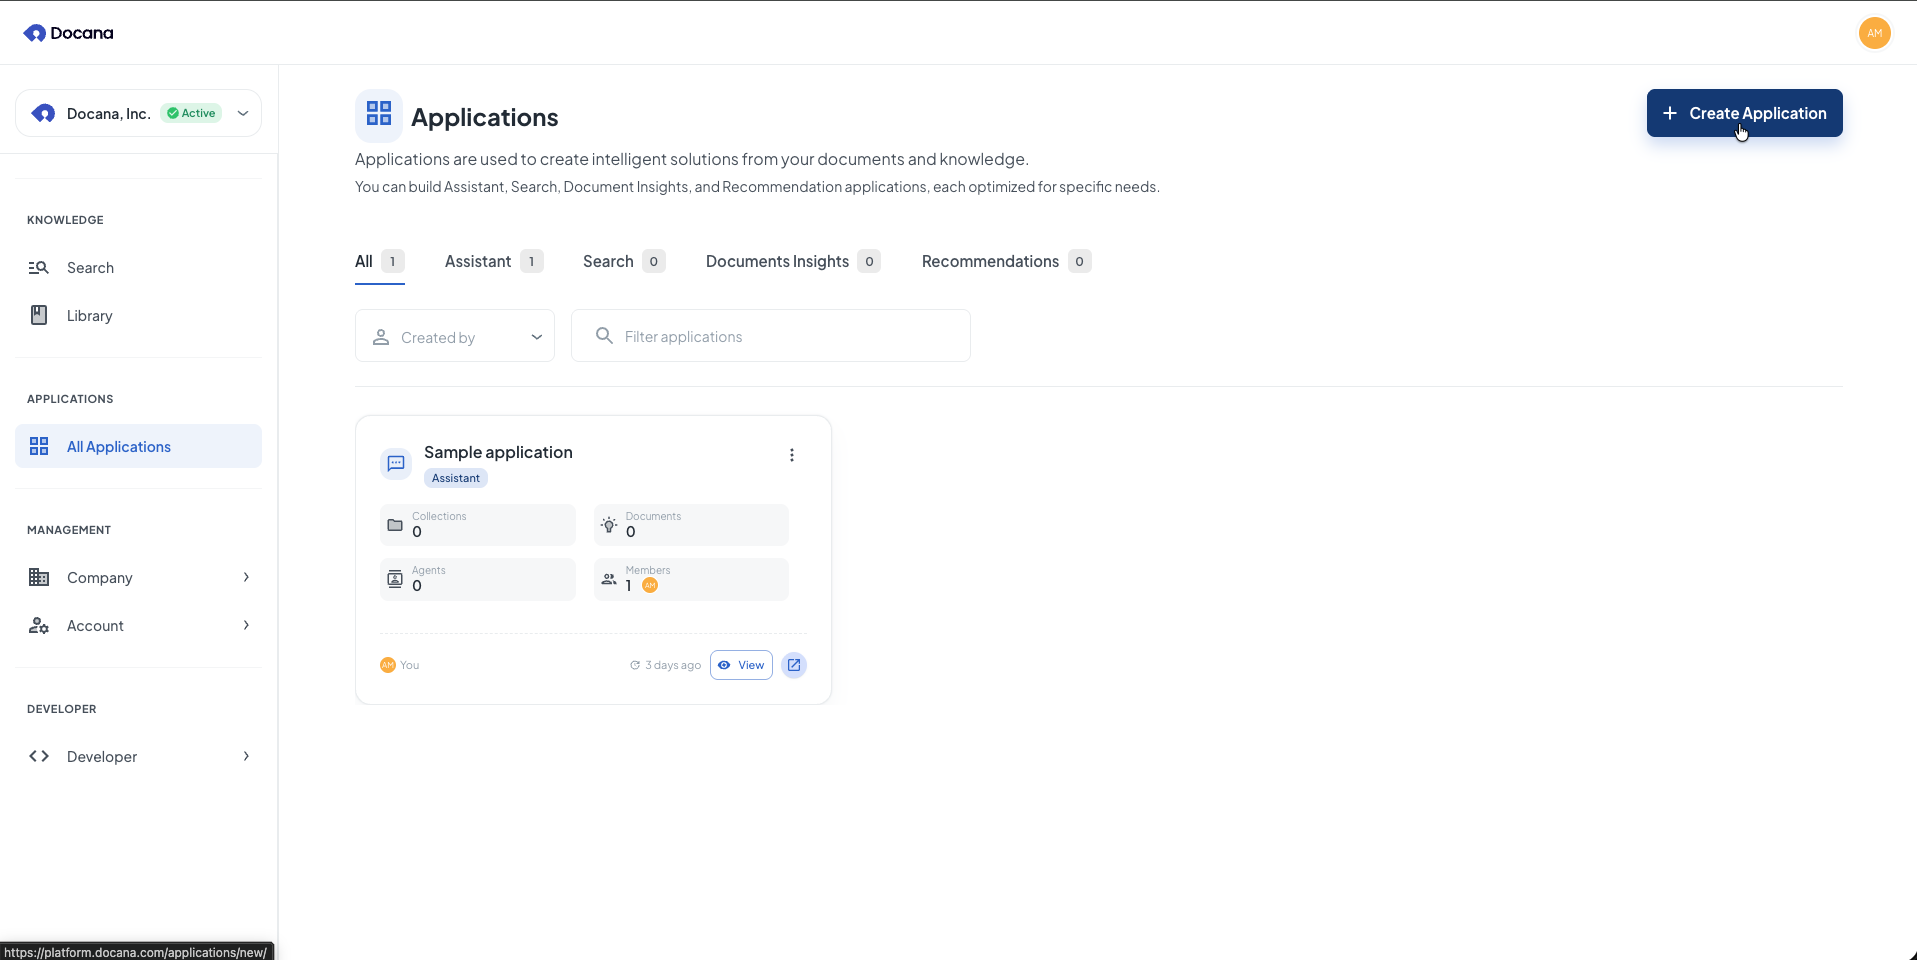
Step 2: Enter Details
Enter these details:
-
Name: Pick a name that describes what the application does (e.g., "Customer Support", "Sales Automation", "Document Processing").
-
Description (optional): Explain what this application is for. This helps your team understand it, and helps agents work better with your application.
-
Settings: Choose any additional settings you need.
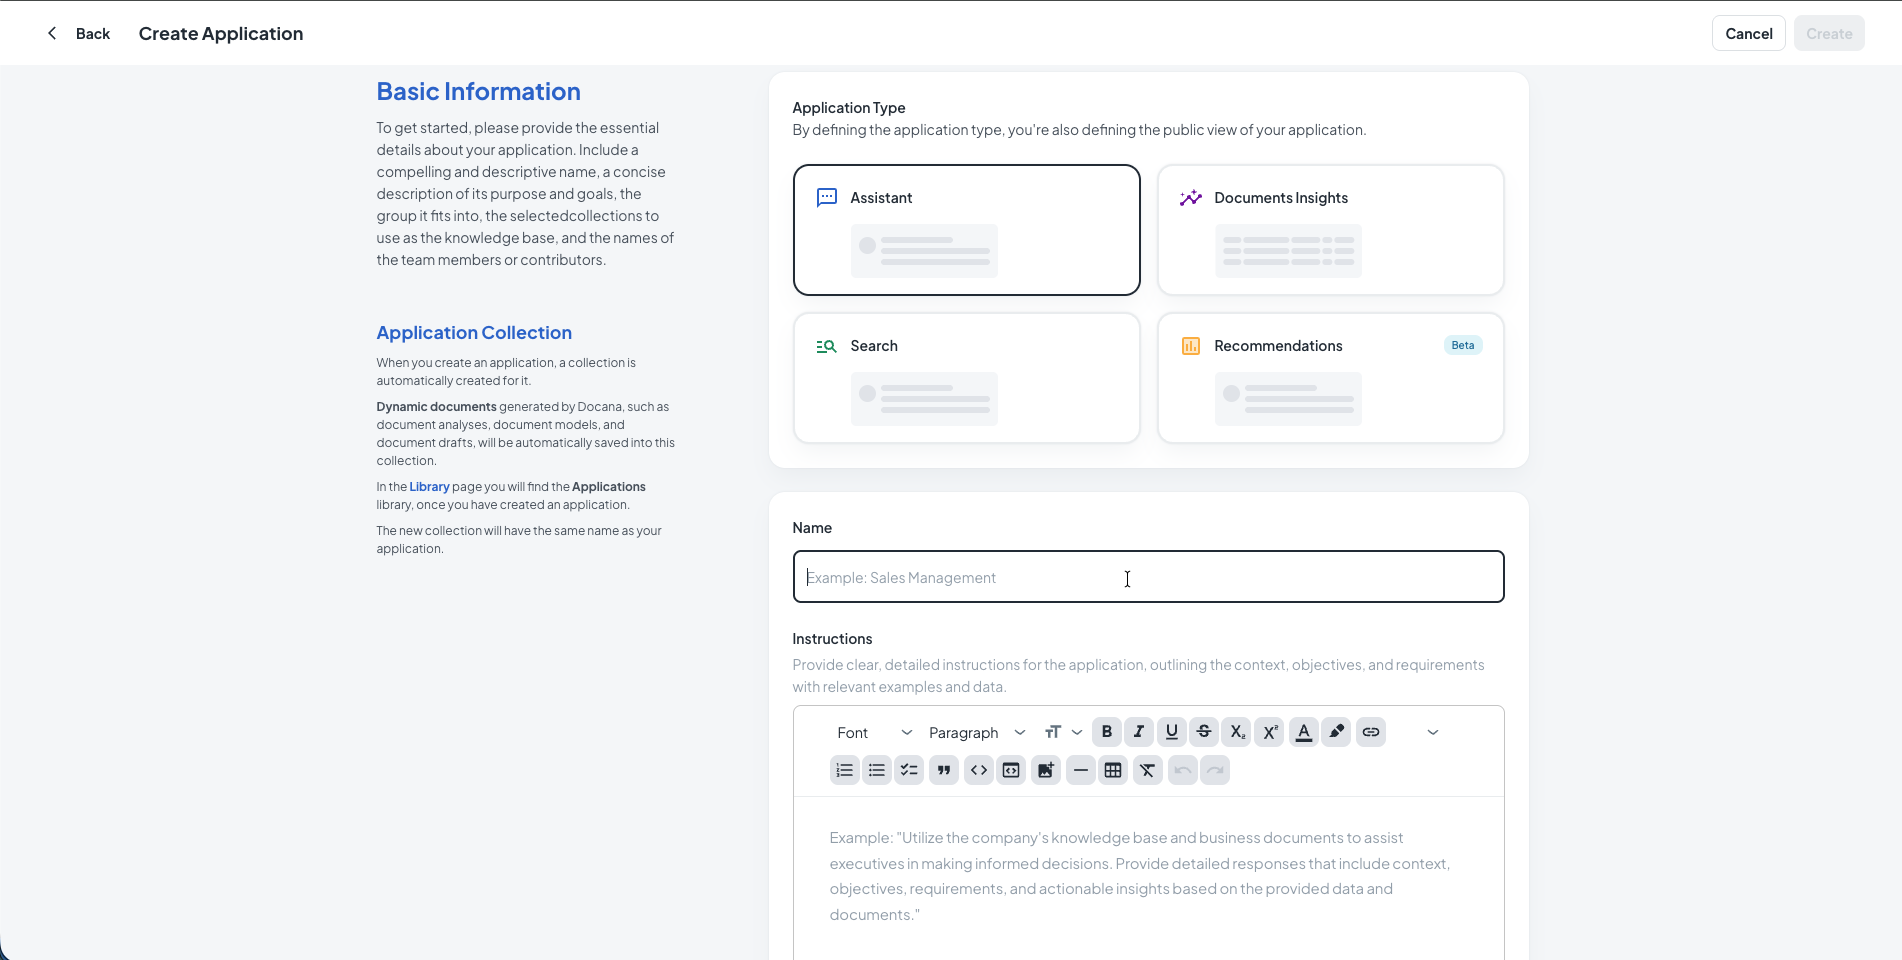
Click Create to finish.
Step 3: What's Next
After creating your application, you'll see the dashboard:
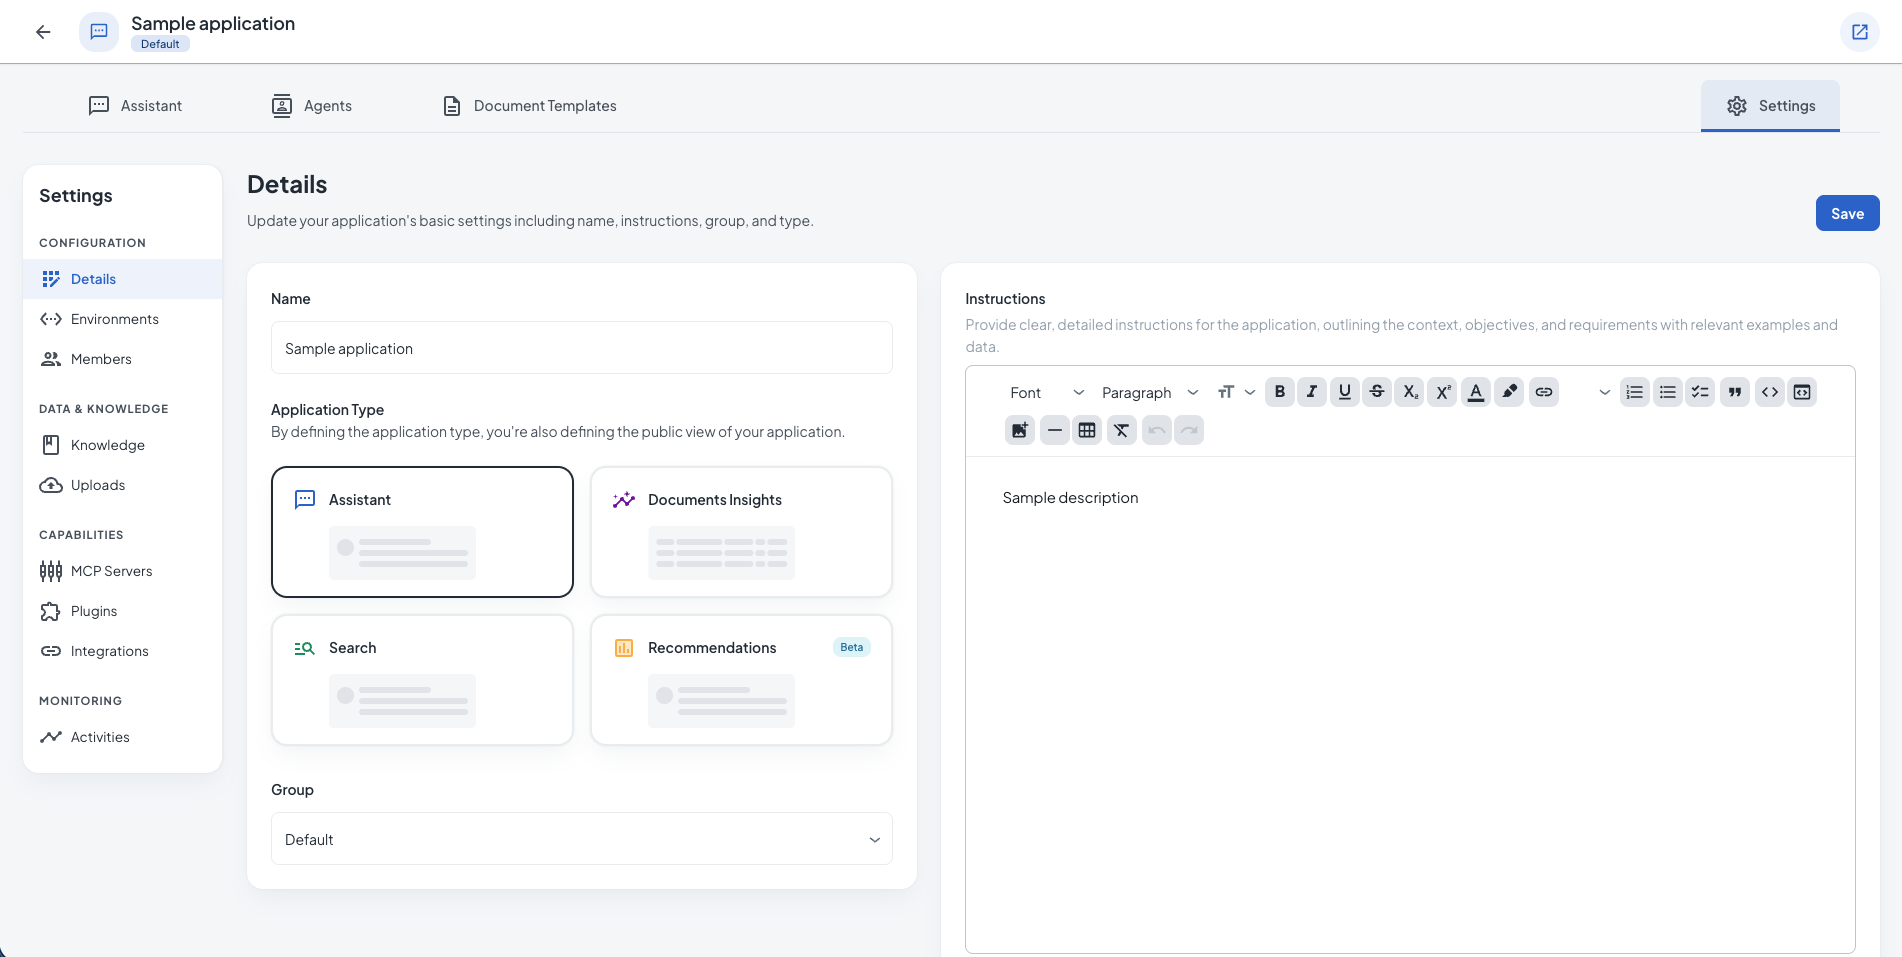
In your application:
- Create and manage AI agents (in the Agents section)
- Set up templates (in the Templates section)
- Search documents and use the Assistant (in the Search & Assistant section)
- Manage uploaded files (in the Files section)
- Manage members and permissions (in the Members section)
- Set up integrations (in the Integrations section)
- Configure settings, knowledge sources, uploads, and MCP servers (in the Settings section)
Company-wide:
- Organize collections and libraries or use Enterprise Search
- Manage users and teams at Company Users and Company Teams
- Set up integrations and MCP servers at Developer Integrations and MCP Servers
Managing Applications
From the Applications list, you can:
- Open: Click an application name to access its features
- Edit: Click the edit icon to change name, description, or settings
- Delete: Click the delete icon to remove permanently
Deleting an application removes everything: agents, collections, and all data. You can't undo this.
Best Practices
-
Use clear names: Pick names that show what the application does (e.g., "HR Document Management", "Customer Onboarding").
-
Organize by function: Create separate applications for different departments or functions. This keeps things organized.
-
Set permissions: Give team members the right level of access. Manage users at Company Users and teams at Company Teams. You can also manage members within your application.
-
Add descriptions: Use the description field to explain what the application does. This helps your team and helps agents work better.
-
Clean up: Review your applications regularly. Remove ones you're not using.
Next Steps
- Creating a Library - Organize your documents in knowledge libraries
- Creating a Collection - Add collections to organize documents within libraries
- Creating an Agent - Create AI agents in your application
- Creating a Template - Set up templates for document generation